 Save to Pinterest
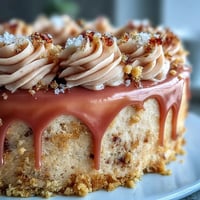
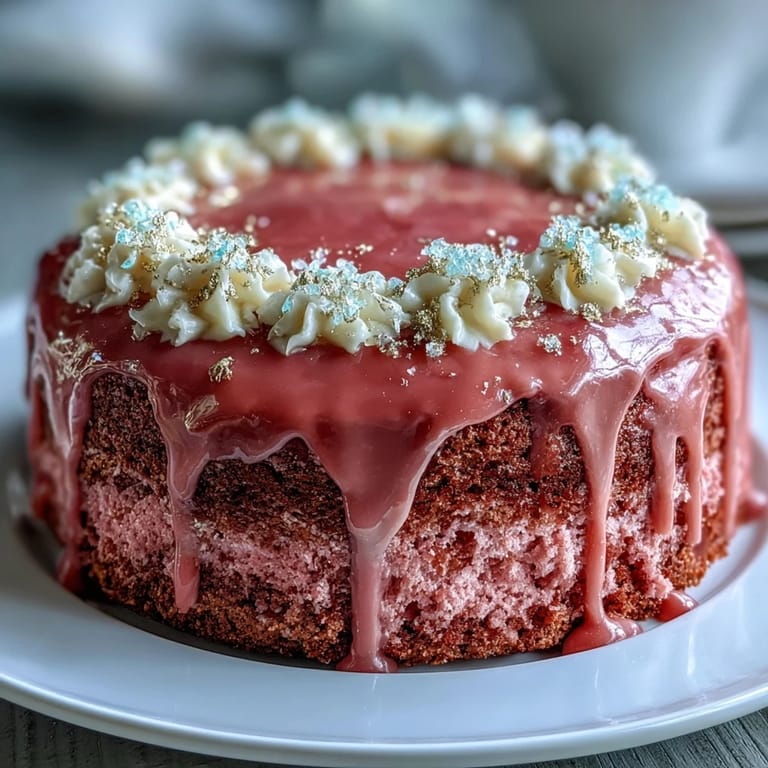
 The first time I made this Rosé Velvet Cake was on a drizzly Saturday, the kind of day that practically begs for baking and music echoing through the kitchen. The scent of wine blooming through the batter gave the whole room a gentle, almost festive lift. I still remember how my hands were dusted pink from a rogue cloud of food coloring. There's something quietly thrilling about watching a classic treat turn into a showstopper with a simple flick of gold paint. This cake felt like a celebration, even when it was just me and my spatula dancing around the mess.
Once, I brought this cake to my cousin's bridal shower, where the clamor of happy voices made it nearly impossible to hear my own thoughts. As the gold drip caught the late afternoon sunlight, everyone paused for just one moment—phones in hand, yes, but also with pure curiosity and delight. The conversation turned quickly from wedding details to how on earth such a rosy, elegant cake was made. It was the first time I’d seen a dessert truly steal the spotlight from the gift table. It’s now unofficially requested for every family gathering that follows.
Ingredients
- Cake flour: Provides that signature fine crumb—sifting it helps avoid lumps and keeps the pink color even throughout.
- Granulated sugar: Don’t skimp—this ensures the crumb stays moist and the edges caramelize just right.
- Baking powder & soda: Yes, you need both for the perfect gentle rise and delicate texture.
- Salt: Even in a cake, a good pinch of salt sharpens all the flavors (I learned the hard way to never forget it).
- Unsalted butter: Let it fully soften—you’ll get lightness and a smooth mix without overbeating.
- Vegetable oil: Adds an almost invisible moisture that keeps the crumb super soft, even after chilling.
- Eggs: Room temperature is key so the batter doesn’t split (I set mine out while the oven preheats).
- Rosé wine (not sparkling): Lends its perfume—choose one you’d happily drink, it truly makes a difference.
- Vanilla extract & white vinegar: Together, they round out flavors and give that velvet cake tenderness.
- Pink gel food coloring (optional): For drama and photo ops, just 1-2 drops is usually enough—add gradually!
- Cream cheese & butter (for frosting): Both must be soft for the silkiest, lump-free spread.
- Powdered sugar: Sift it right into the bowl—no one wants a clumsy swirl of sugar in the final cut.
- White chocolate (for drip): Chop it fine so it melts quickly and evenly with the cream.
- Heavy cream: Heat it until just steamy—that’s when the chocolate will blend luxuriously smooth for the gold drip base.
- Edible gold luster dust & vodka/lemon extract: Mixing with vodka or extract helps the gold paint dry instantly, so it doesn’t smudge on your showpiece.
Tired of Takeout? 🥡
Get 10 meals you can make faster than delivery arrives. Seriously.
One email. No spam. Unsubscribe anytime.
Instructions
- Prep the cake pans:
- Grease and line three 8-inch pans with parchment, then enjoy the oddly satisfying press as the parchment fits perfectly in place.
- Mix the dry ingredients:
- In a bowl, whisk cake flour, baking powder, baking soda, and salt until the color is uniform and the air smells subtly toasty.
- Cream butter, oil & sugar:
- Use your mixer to beat them until pale and airy—about three minutes, listening for the thwack-thwack of the paddle scraping the bowl.
- Add eggs and liquids:
- Incorporate eggs one by one with a steady beat, pausing to add vanilla and vinegar, then watch as the batter gets almost silky.
- Alternate flour and rosé:
- Add flour mixture in thirds and rosé in halves, starting and ending with flour; swirl in a drop of pink food coloring if you want an extra pop.
- Bake:
- Divide the batter evenly, smoothing each with a gentle jiggle, and bake for 30–35 minutes, savoring how the kitchen melts into a sweet cloud.
- Cool and release cakes:
- Rest cakes in pans for 10 minutes, then turn onto racks; you’ll hear the soft sigh as they slip free.
- Make the frosting:
- Beat cream cheese and butter together until feather-light, gradually adding sifted powdered sugar, then swirl in vanilla and a pinch of salt.
- Assemble and frost:
- Level cooled cakes if needed; alternate layers of cake and billowy cream cheese frosting, spiraling it up the sides and over the top.
- Prepare the gold drip:
- Heat cream just to steaming, pour over white chocolate, and whisk to a silken ganache—let it cool before dripping along cake edges.
- Paint the drip:
- Mix gold dust with vodka or lemon extract until shiny, then brush each chill-set drip carefully for that unforgettable gilded finish.
 Save to Pinterest
 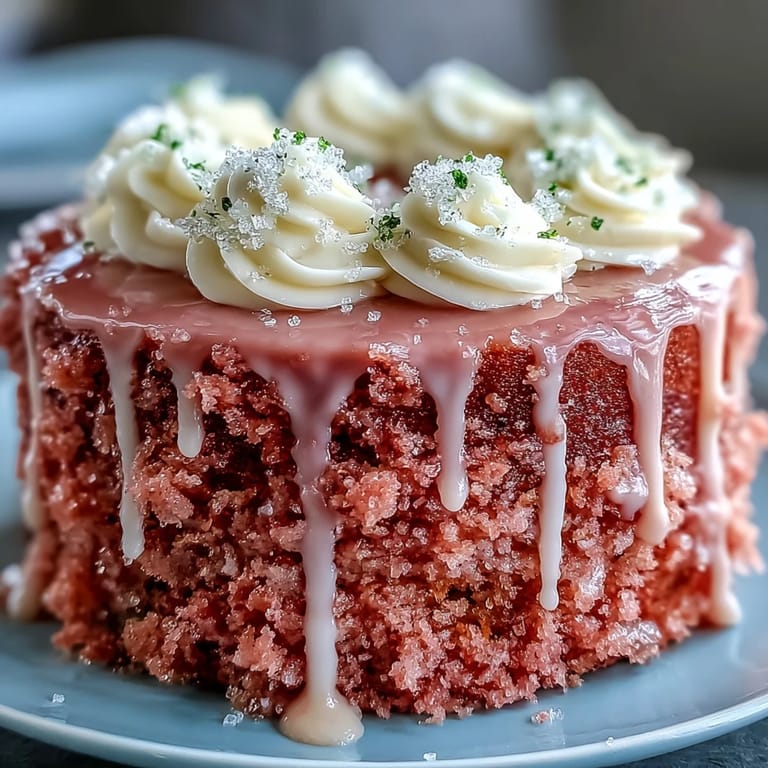 Save to Pinterest
 I remember one dinner when the cake was just dessert, but became the centerpiece because everyone wanted to snap a photo before tasting. Someone even asked if the gold was real—and when I showed them the luster dust container, we all laughed at our gilded fingertips. At that moment, the cake felt like more than a dessert—it was a memory already in the making.
What To Serve It With
This cake is practically made to sit on a table surrounded by clinking glasses of rosé. I’ve also teamed it with tart raspberry coulis and piles of fresh strawberries; the brightness balances the creamy frosting and wine-scented cake beautifully. For a more decadent touch, try a scoop of vanilla bean ice cream on the side—the gold drips and melting ice cream turn every plate into edible art.
Decorating Without the Pressure
Trust me, no one at the party is inspecting your drip for symmetry. If a little ganache runs too far, just swoosh it back into place with your spatula and call it character. I used to worry about every brushstroke but quickly learned that a few uneven lines only make it look more inviting—and people really do love a bit of handmade charm.
Making It Ahead & Storing Leftovers
If you’re prepping for a big day, bake and wrap the cake layers tightly, then freeze them up to a week in advance. Just let them thaw completely before frosting for the smoothest results. Frosted, the cake keeps best refrigerated, but I always try to slice and serve it at just cooler than room temperature for the best creaminess and flavor.
- Let the gold paint dry fully before covering or transporting.
- Use a hot knife for the cleanest slices through the chill.
- Store leftover cake tightly wrapped to lock in moisture and stop fridge odors from sneaking in.
 Save to Pinterest
  Save to Pinterest
 I hope making this cake brings a little fun and sparkle to your table—however you celebrate. Don’t forget to share a slice (and maybe a story) with someone you love.
Recipe FAQs
- → Can I omit the alcohol and keep the same flavor?
Yes. Substitute equal parts pink grape juice plus a splash of lemon to mimic the rosé's fruity acidity without alcohol; reduce any added sweetness if your juice is sweet.
- → How do I get an even pink hue without over-coloring?
Use gel food coloring sparingly and add a little at a time to the batter until you reach the desired shade. Gel concentrates color without thinning the batter, so you preserve texture while achieving a consistent tint.
- → What keeps cream cheese frosting stable for stacking layers?
Chill the frosting briefly after whipping to firm it, and use a light crumb coat before the final layer. Keep the assembled cake chilled while preparing the drip to prevent sliding.
- → How do I make a smooth white-chocolate drip?
Heat heavy cream until steaming, pour over chopped white chocolate, let sit 2 minutes, then whisk until glossy. Cool slightly so it thickens but still pours slowly; test on the edge of a chilled cake.
- → What’s the best way to apply edible gold for a neat finish?
Mix gold luster dust with a small amount of vodka or lemon extract to a paint-like consistency and use a clean food-safe brush to paint the solidified white-chocolate drips. Work in thin layers for even coverage.
- → How should the cake be stored and served?
Refrigerate to keep the cream cheese frosting firm; bring to room temperature 30–60 minutes before serving for best texture and flavor. Store covered to prevent drying.