 Save to Pinterest
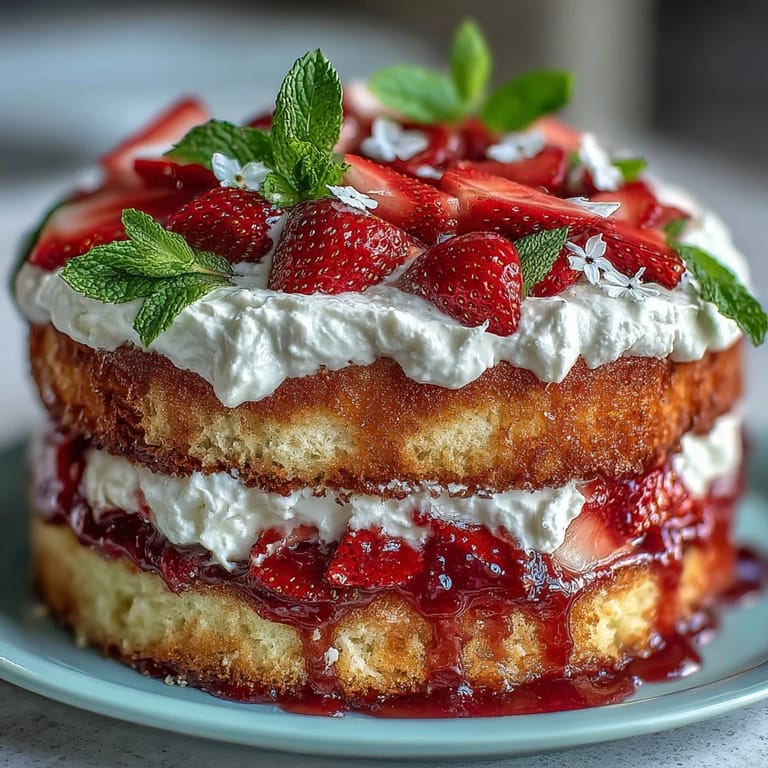
 There's something about the first warm breeze in spring that makes me crave lighter desserts, and this naked cake with strawberries and cream feels like it was designed for that very moment. The scent of fresh strawberries always reminds me how quickly the seasons shift—one minute, we're at the farmer's market picking out the reddest berries and the next, we're back in the kitchen, debating how many slices we'll sneak before serving. The way cake crumbs stick to your fingertips and whipped cream fluffs unexpectedly high never fails to put a grin on my face. Every time I assemble those layers, I notice the kitchen gets quieter, as if everyone's anticipating the first bite. It's just joyful, and I've learned to embrace all the little imperfections along the way.
I once made this cake for a friend's spring birthday picnic—we ended up laughing about the uneven layers, but no one cared once it was sliced. She joked that our cake looked "naked" and elegant, and the edible flowers we picked from her tiny garden made it feel like a celebration in itself. The sunlight caught the whipped cream just right, and for a moment, everyone was silent, savoring the flavors and the day. We kept sneaking second helpings, the strawberries disappearing faster than we anticipated. It was the kind of afternoon where dessert felt like the main event.
Ingredients
- All-purpose flour: The backbone of your sponge—I sift it for extra lightness, which helps the cake rise beautifully.
- Granulated sugar: It sweetens without overwhelming and helps the cake structure hold; creaming it thoroughly is key to a tender crumb.
- Unsalted butter: Soften it completely before mixing—cold butter makes the batter lumpy and uneven.
- Large eggs: Room temperature eggs blend smoothly, giving your cake a cohesive texture.
- Whole milk: Adds richness and keeps the sponge moist—don't skip it, even if tempted to use low-fat.
- Baking powder: Gives that delicate rise—check your baking powder's freshness for best results.
- Vanilla extract: A little goes a long way, providing warmth and a lovely aroma throughout the cake and cream.
- Salt: The secret balance—a pinch brings out flavors and stops sweetness from becoming cloying.
- Heavy whipping cream: Always use cold cream for firm peaks; it whips up fast and stays stable.
- Powdered sugar: Dissolves perfectly into the cream, making it velvety and smooth without gritty texture.
- Fresh strawberries: Choose ripe, vibrant berries—they're juicy and fragrant, the highlight of every slice.
- Edible flowers or mint leaves: Optional, but I often add them for a pop of color and fresh flavor at presentation.
Tired of Takeout? 🥡
Get 10 meals you can make faster than delivery arrives. Seriously.
One email. No spam. Unsubscribe anytime.
Instructions
- Prepare Your Pans:
- Grease two 8-inch round cake pans, then line them with parchment—this ensures the sponge slides out intact after baking.
- Mix Butter and Sugar:
- Beat butter and granulated sugar in a large bowl for about three minutes, listening for the soft thwumps as the mixture turns fluffy and pale.
- Add Eggs and Vanilla:
- Crack in eggs one at a time, beating well after each; let the kitchen fill with the sweet hint of vanilla as it blends.
- Combine Dry Ingredients:
- Whisk flour, baking powder, and salt together—hold the bowl up to check for clumps, so the batter stays silky.
- Bring Batter Together:
- Add dry mix to the wet mixture in three parts, alternating with milk—watch the batter thicken and shimmer after each addition.
- Divide and Smooth:
- Spread the batter evenly between pans; use a spatula to smooth the tops for uniform layers.
- Bake and Cool:
- Bake for 22–25 minutes until a toothpick comes out clean; let cakes rest in their pans for ten minutes, then turn onto wire racks to cool fully.
- Make Whipped Cream:
- Beat cold heavy cream with powdered sugar and vanilla until stiff peaks form—the mixture should feel airy and thick, almost cloud-like.
- Trim for Evenness:
- Once cooled, take a serrated knife to trim any domed tops; aim for flat, neat cake layers.
- First Layer Assembly:
- Set one cake on a serving plate, pile on half the whipped cream, and top with half the strawberries—let their juices seep into the sponge.
- Second Layer Assembly:
- Place the second cake layer, spread remaining cream, then arrange strawberries on top with careless beauty.
- Decorate and Serve:
- Scatter edible flowers or mint leaves if you like—serve immediately or chill for up to two hours while flavors meld.
 Save to Pinterest
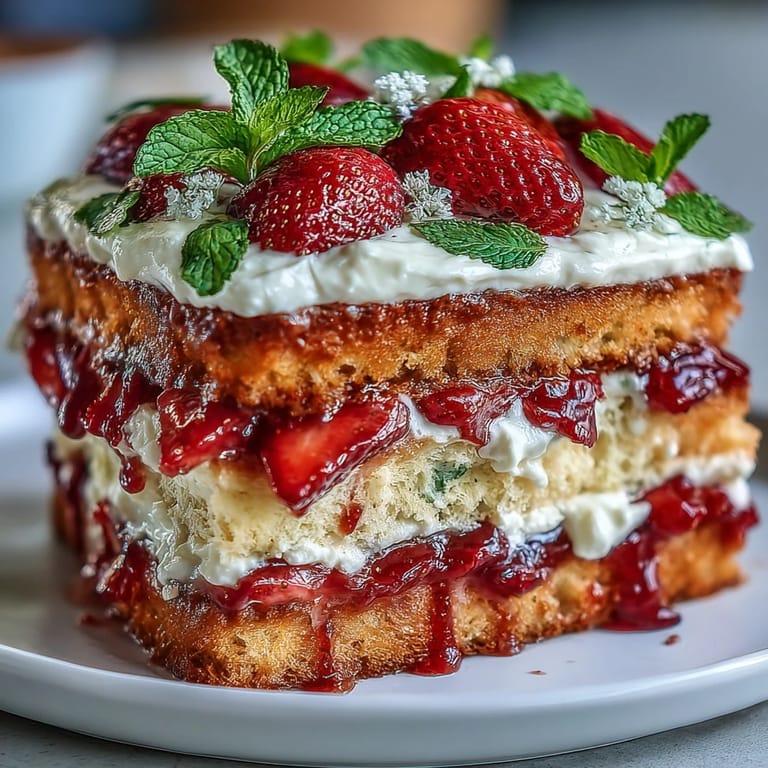
 The time my cousin called the cake "the taste of sunshine" remains etched in my mind—it was for his graduation, and even the shyest guests couldn't resist a second helping. That day, the cake proved itself more than just dessert—it became a centerpiece, sparking conversations and laughter among friends who barely knew each other. Looking back, I realize the recipe carries a little bit of joy each time. It's one of the reasons I keep returning to it. Somehow, it always becomes a dish that people remember long after the plates are cleared.
Keeping Your Sponge Moist
One thing that surprised me is how a splash of milk, and mixing only until combined, keeps the sponge tender and prevents drying. If you overmix, don't panic—just be gentle on the next steps, and the cake should still taste wonderful. Sometimes I brush a bit of strawberry syrup on the cooled layers for extra moisture and flavor. This small touch keeps leftovers as good as the first slice. It also helps subtle flavors shine through even if the cake sits a while.
Perfecting Whipped Cream
Getting the cream just right felt intimidating at first, but starting with cold ingredients and a chilled bowl makes a big difference. Occasionally, I'll whisk by hand to feel the thickness, but an electric mixer saves time and wrist strain. If it starts to look grainy, I add another spoonful of cream and gently fold until it smooths out. Stable peaks mean beautiful layers and easy slicing. It's the secret to that airy, melt-in-your-mouth texture.
Last Touches and Serving Tricks
Decorating is where you can really play—sometimes I've used edible flowers, but a sprig of mint or sliced berries does wonders. Serve the cake chilled if possible—it makes the cream taste extra refreshing. Don't wait too long after assembling because the sponge starts absorbing the berry juices. I've learned that cutting with a warm, serrated knife gives clean slices and preserves those pretty layers.
- If you want show-stopping presentation, stack slices with care and wipe the knife between cuts.
- Always taste your berries before using—if they're tart, sprinkle with a pinch of sugar.
- Let guests dive in quickly—the cake displays best within the first hour.
 Save to Pinterest
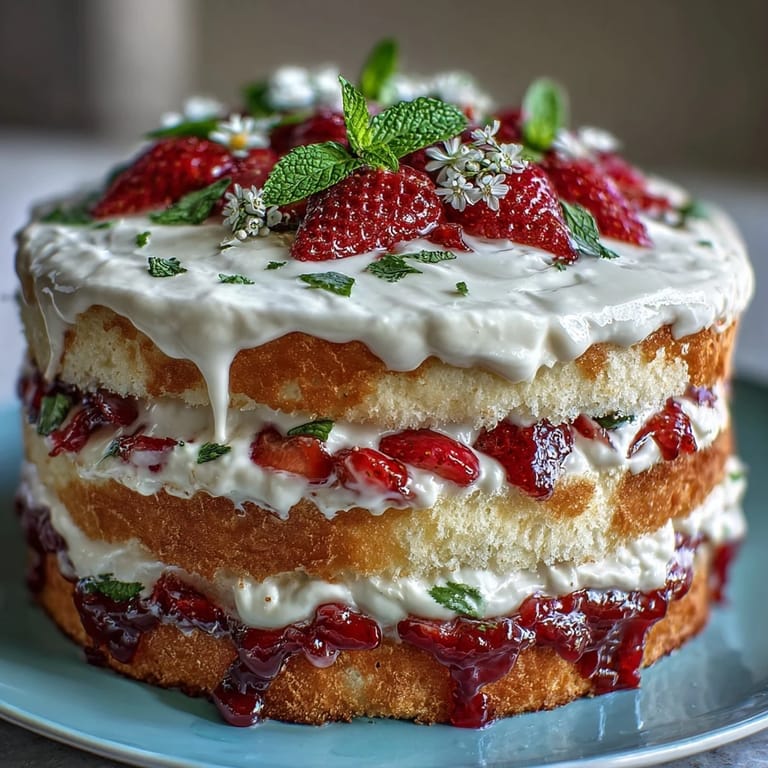
 If you make this spring cake, I hope your kitchen fills with laughter and that each slice tastes brighter than the last. It's truly a celebration of the season in every bite.
Recipe FAQs
- → How do I ensure the sponge cake stays moist?
Do not overmix the batter, and avoid overbaking. Brush the layers with strawberry syrup for extra moisture.
- → Can I use different fruits for the filling?
Yes, raspberries or blueberries can be substituted for a unique twist and flavor variation.
- → What decoration options work well?
Edible flowers or mint leaves enhance appearance and aroma. Fresh berries also add a colorful finish.
- → How long does the assembled cake keep?
Enjoy within 2 hours for best freshness, but it can be chilled for short periods. Sponge may soften over time.
- → Is an electric mixer required?
An electric mixer is recommended to achieve fluffy butter and cream. Hand mixing may not yield the same texture.
- → Can I make the sponge ahead of time?
Yes, bake and cool sponge layers in advance. Assemble with cream and strawberries shortly before serving.