 Save to Pinterest
 There's something about the smell of chili that fills a kitchen with instant warmth, even on the coldest evenings. I discovered my love for chili con carne during a particularly chaotic dinner party when I'd completely underestimated how many people would show up. With limited time and a pantry full of basics, I threw together what I had—ground beef, canned tomatoes, and whatever spices were within arm's reach. What emerged was a rich, comforting stew that somehow tasted like I'd been simmering it all day. My guests came back for thirds, and I realized that sometimes the best meals come from happy accidents.
I'll never forget the first time I made this for my neighbor who'd just moved in. She'd mentioned loving chili, so I invited her over on a rainy Saturday afternoon. As the pot simmered away, the aroma drifted into her place next door—she texted asking what smelled so incredible, and showed up early with a bottle of wine. We talked for hours over bowls of it, and she's requested it every season since. That's when I understood that good food isn't just about flavor; it's about the moments it creates.
Ingredients
- Ground beef (1½ lbs, 80/20 blend): The fat content matters here—it renders into the sauce and adds richness that lean beef can't quite deliver, but don't go higher than 80/20 or you'll end up skimming grease.
- Yellow onion, diced (1 large): Yellow onions have a natural sweetness that balances the spices beautifully as they soften and practically dissolve into the sauce.
- Garlic, minced (3 cloves): Fresh garlic makes a noticeable difference; jarred just doesn't have the same punch or depth.
- Red and green bell peppers (1 each, diced): Together they add sweetness, texture, and visual appeal—leave them chunky enough to bite into but small enough to cook down properly.
- Jalapeño, seeded and finely chopped (1, optional): Removing the seeds keeps things more approachable for mixed crowds, but the membranes carry most of the heat if you want to dial it up.
- Diced tomatoes, canned (28 oz can): Canned tomatoes are actually superior here—they're picked at peak ripeness and consistent year-round, unlike fresh tomatoes which vary wildly.
- Kidney beans, canned (two 15 oz cans, drained and rinsed): Rinsing removes excess sodium and that starchy liquid, which keeps the chili from becoming gloppy and overwhelming.
- Tomato paste (2 tbsp): This concentrates tomato flavor and adds body; it's not optional, so don't skip it.
- Beef broth (1 cup): Use the low-sodium version—canned chili is already seasoned generously, and you want control over the salt.
- Chili powder (2 tbsp): This is the backbone of the dish, so grab the good stuff from a spice shop if you can; supermarket chili powder can taste dusty.
- Ground cumin (2 tsp): Cumin adds earthiness and warmth without heat; it's what makes this taste authentically Tex-Mex rather than just spicy tomato stew.
- Smoked paprika (1 tsp): A subtle smoky layer that makes people ask what your secret ingredient is, even though it's just paprika.
- Cayenne pepper (½ tsp, adjust to taste): Start here and taste before adding more; cayenne builds heat quickly and is unforgiving.
- Dried oregano (1 tsp): Oregano brings herbal notes that make the spice blend feel complete rather than one-dimensional.
- Salt and black pepper (1½ tsp salt, ½ tsp pepper, plus more to taste): Season aggressively at the end after it's all cooked down; the flavors concentrate and change as the liquid reduces.
Tired of Takeout? 🥡
Get 10 meals you can make faster than delivery arrives. Seriously.
One email. No spam. Unsubscribe anytime.
Instructions
- Brown the beef:
- Heat your pot over medium-high heat until it's hot enough that a drop of water sizzles immediately. Add the ground beef and break it apart with your spoon as it cooks, working it into small, even pieces so it browns instead of steaming—you want the meat to touch the hot surface, not sit in its own liquid. This should take about 5–7 minutes, and you'll know it's done when there's no pink left and the edges are slightly caramelized. Drain off excess fat if there's more than a thin sheen left in the pot.
- Sauté the vegetables:
- Add your onions, garlic, bell peppers, and jalapeño to the beef and let them cook together for 5–6 minutes, stirring occasionally. You're looking for the vegetables to soften and the onions to turn translucent, which is when they release their sweetness. The garlic will perfume the whole pot and stop smelling raw once it's had about a minute or two in the heat.
- Toast the spices:
- Sprinkle in the chili powder, cumin, paprika, cayenne, oregano, salt, and pepper, then stir constantly for about 1 minute. This toasting step is crucial—it wakes up the spices and lets them bloom into the fat, rather than tasting raw and dusty. You'll notice the aroma shift from fresh vegetables to something warmer and more complex.
- Add the tomato paste:
- Stir in the tomato paste and cook it with the spice mixture for another minute, letting it caramelize slightly into the bottom of the pot. This concentrates the tomato flavor and adds a subtle depth that you'd miss if you just dumped it all in at once.
- Build the sauce:
- Pour in your canned tomatoes, kidney beans, and beef broth, stirring until everything is combined and the pot looks cohesive rather than layered. The liquid will look like a lot, but it will reduce and concentrate as it simmers.
- Simmer low and slow:
- Bring the chili to a gentle boil, then immediately drop the heat to low, cover the pot, and let it bubble away quietly for 45 minutes. Stir it once or twice so nothing sticks to the bottom, but mostly just let time do the work. The flavors will meld and deepen, and the sauce will thicken as it reduces.
- Taste and adjust:
- After 45 minutes, taste it and see what it needs—more salt, a touch more heat, or perhaps a bit more richness. If you want an even thicker chili, uncover it and simmer for another 10–15 minutes; the longer it bubbles, the more concentrated and velvety it becomes.
 Save to Pinterest
 I learned the hard way that chili improves overnight—I made a batch for a Super Bowl party and had leftovers that seemed fine but nothing special. The next day I reheated it, and suddenly it was magnificent, deeper and more harmonious than when I'd first finished cooking it. Now I deliberately make it a day early whenever I can, and everyone thinks I'm a better cook than I actually am.
Heat Control
The beauty of this chili is how easily you can customize the heat level without losing the essential character of the dish. If you're cooking for a mixed group, start with the measured amounts of chili powder and cayenne, then add a pinch more cayenne at the table for anyone who wants extra punch. Jalapeños are totally optional, and you can remove the seeds and membranes for a milder version that still adds vegetable texture and a whisper of spice.
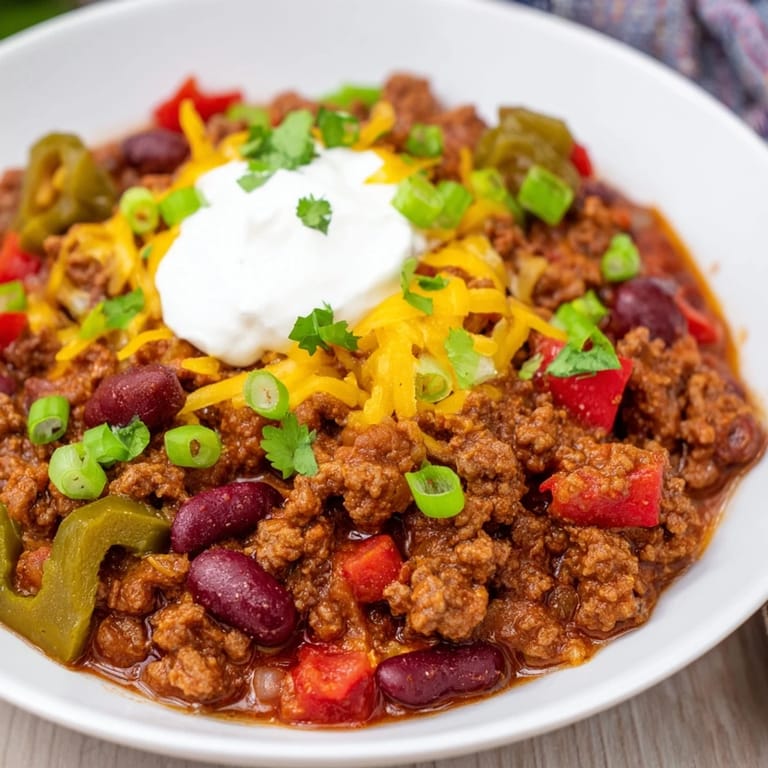
The Topping Station
The toppings are where chili gets personal and fun—set them out in small bowls and let people build their own bowl. Sour cream cools the spice and adds creaminess, sharp cheddar adds sharpness, fresh cilantro and green onions brighten everything, and avocado brings richness. One trick I learned is to dollop the sour cream directly on top of the hot chili in each bowl rather than stirring it in, so it stays creamy and doesn't disappear into the sauce.
Storage and Make-Ahead Magic
This chili is one of the best things to make ahead—it reheats beautifully and actually tastes better the next day or even two days later as the flavors continue to meld and deepen. Store it in an airtight container in the refrigerator for up to 4 days, or freeze it for up to 3 months (it thaws slowly, so plan ahead). Reheat it gently on the stove over low to medium heat, stirring occasionally and adding a splash of broth or water if it's gotten too thick during storage.
- Pair it with cornbread or rice if you want to stretch it further.
- Leftovers make incredible chili dogs, baked potato toppers, or nachos.
- Double the recipe and freeze half for an easy dinner that's ready whenever you need it.
 Save to Pinterest
 This chili has become my go-to dish for when I want to feel like I've done something meaningful in the kitchen without spending hours there. It's humble enough to feel accessible but impressive enough that people always ask for the recipe.
Recipe FAQs
- → What types of meat can I use besides ground beef?
You can substitute ground turkey or chicken for a lighter alternative without compromising flavor.
- → How can I adjust the heat level?
Omit the jalapeño and reduce cayenne pepper for a milder taste, or keep them to maintain spice.
- → What toppings complement this dish best?
Fresh sour cream, shredded cheddar, chopped cilantro, sliced green onions, and diced avocado add great texture and flavor.
- → How long should the stew simmer for best results?
Simmer covered for 45 minutes, then optionally uncovered for 10–15 minutes to thicken and deepen flavors.
- → What side dishes pair well with this stew?
Cornbread or steamed rice make excellent side options that balance the spiciness.
- → Is this stew gluten-free?
Yes, the main ingredients are naturally gluten-free, but always check canned products and toppings for hidden gluten.